Connecting the CI HUB AI Connector to ChatGPT
CI HUB BRIGHT can be connected directly to ChatGPT through the CI HUB App. Once connected, you can authorize your CI HUB account and start accessing your DAM systems and storage providers directly within ChatGPT.
Step 1: Install the CI HUB App in ChatGPT
To install the CI HUB App, open ChatGPT and navigate to Apps.
In the Apps section:
- Search for CI HUB.
- Select the CI HUB App from the results.
- Click Connect.
- Sign in with your CI HUB account credentials.
Alternatively, you can access the CI HUB App directly using the following link:
https://chatgpt.com/apps/ci-hub/asdk_app_69b8123ab5388191987b778bb07d2466
After opening the link, simply follow the instructions to connect your CI HUB account.
Step 3: Authorize the Connection
-
On the authorization page, click the “Authorize CI HUB” button.
-
Enter your CI HUB ID and log in with your credentials.
-
After successful authorization, the CI HUB AI Connector will connect with your ChatGPT environment.
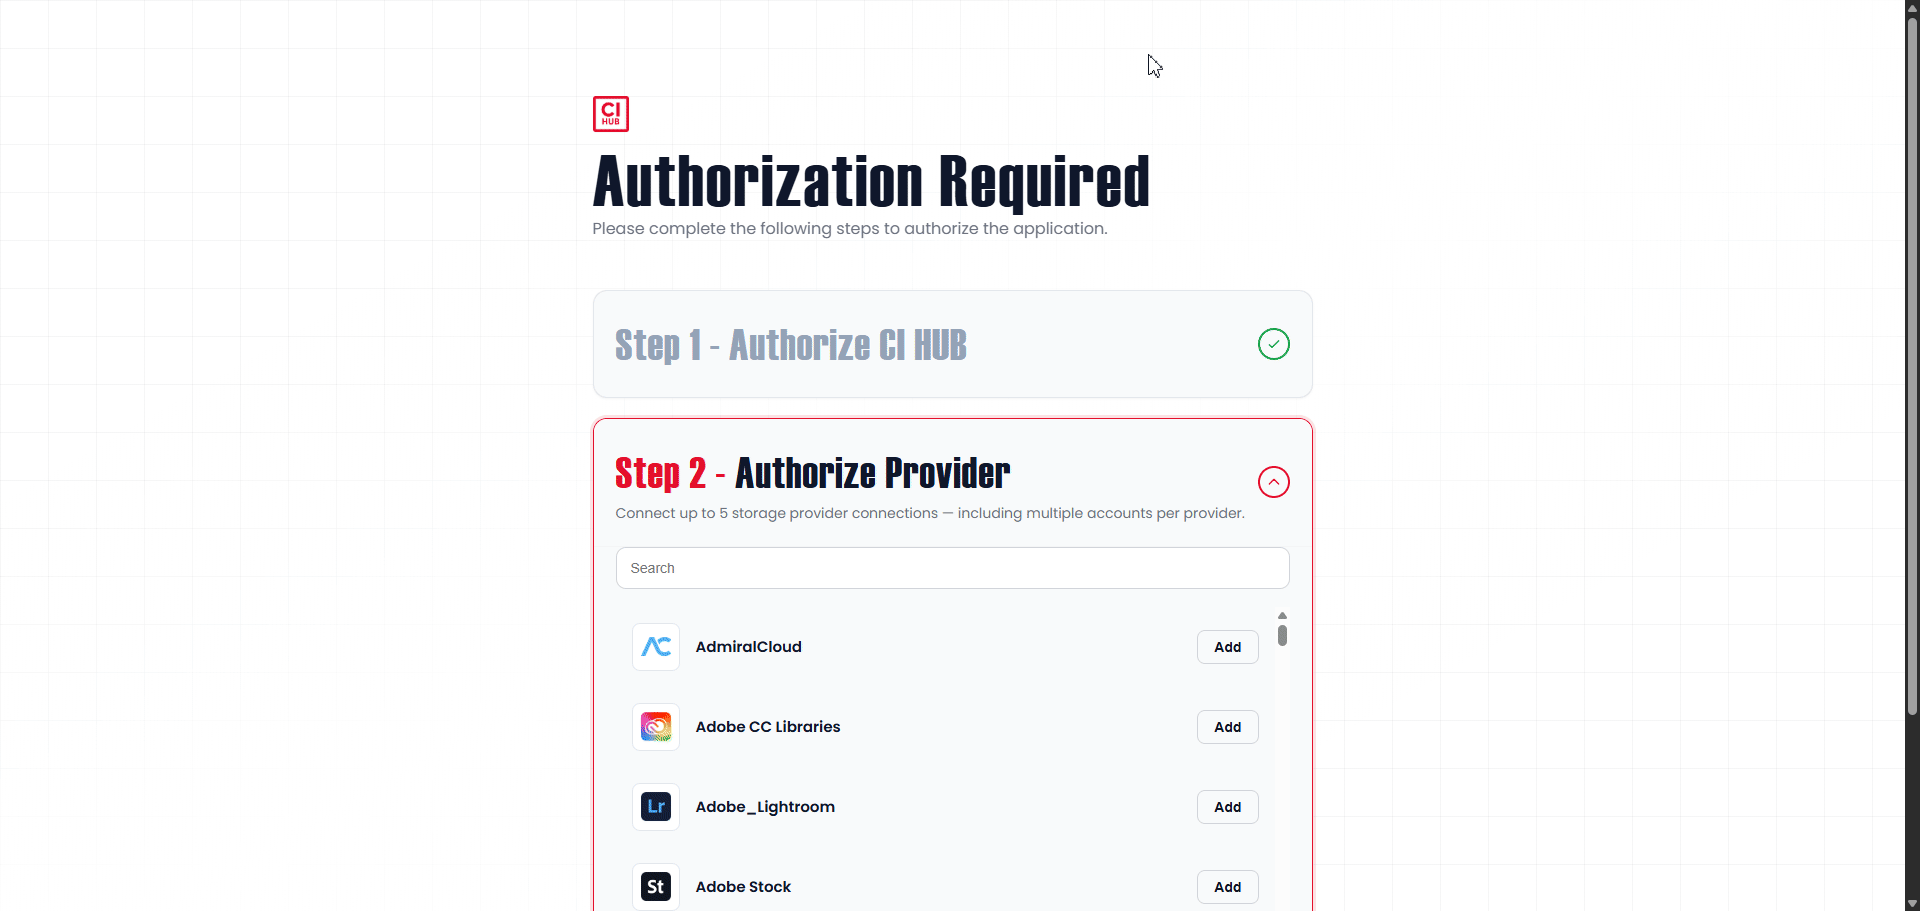
Once this authorization is complete, you can proceed to add your DAM systems and other storage providers.

Adding Your DAM System
Now that your CI HUB BRIGHT - CI HUB AI Connector is authorized and connected to ChatGPT, it’s time to integrate your Digital Asset Management (DAM) systems. This step allows ChatGPT to directly access, search, and manage your digital content.
Step 1: Add Storage Provider Connections
-
You can connect up to five different storage providers within your CI HUB AI Connector.
-
To add a DAM system, choose one from the available list or use the search bar to find your specific platform (e.g., Dropbox, Aprimo, or others).
Step 2: Authenticate and Customize
-
Select your DAM system and log in using your credentials.
-
Optionally, customize the name of your DAM connection for easier identification within ChatGPT.
-
Save your configuration to establish the link.
Step 3: Finalize Authorization
After you’ve connected and saved your chosen DAM systems, complete the authorization process. You’ll then be redirected back to the ChatGPT interface, where your DAM integrations will appear as active connections under the CI HUB AI Connector.
You can explore all available CI HUB AI Connector capabilities and actions in this article: https://support.ci-hub.com/ci-hub-bright-ci-hub-ai-connector-capabilities-and-actions