
Adding a new connection to your DAM, MAM, PIM, or cloud storage system in the CI HUB Connector is quick and straightforward. Once connected, you can manage all your source systems from the Connections panel, rename individual connections, refresh them when needed, or remove them at any time. This allows you to access all your content from one central place without switching between applications.
Adding a DAM, PIM, MAM or cloud storage system
Whether you're connecting a DAM, MAM, PIM, or cloud storage system, the setup process is always the same. Simply select your source system, authenticate, and the connection will be available in the CI HUB Connector.
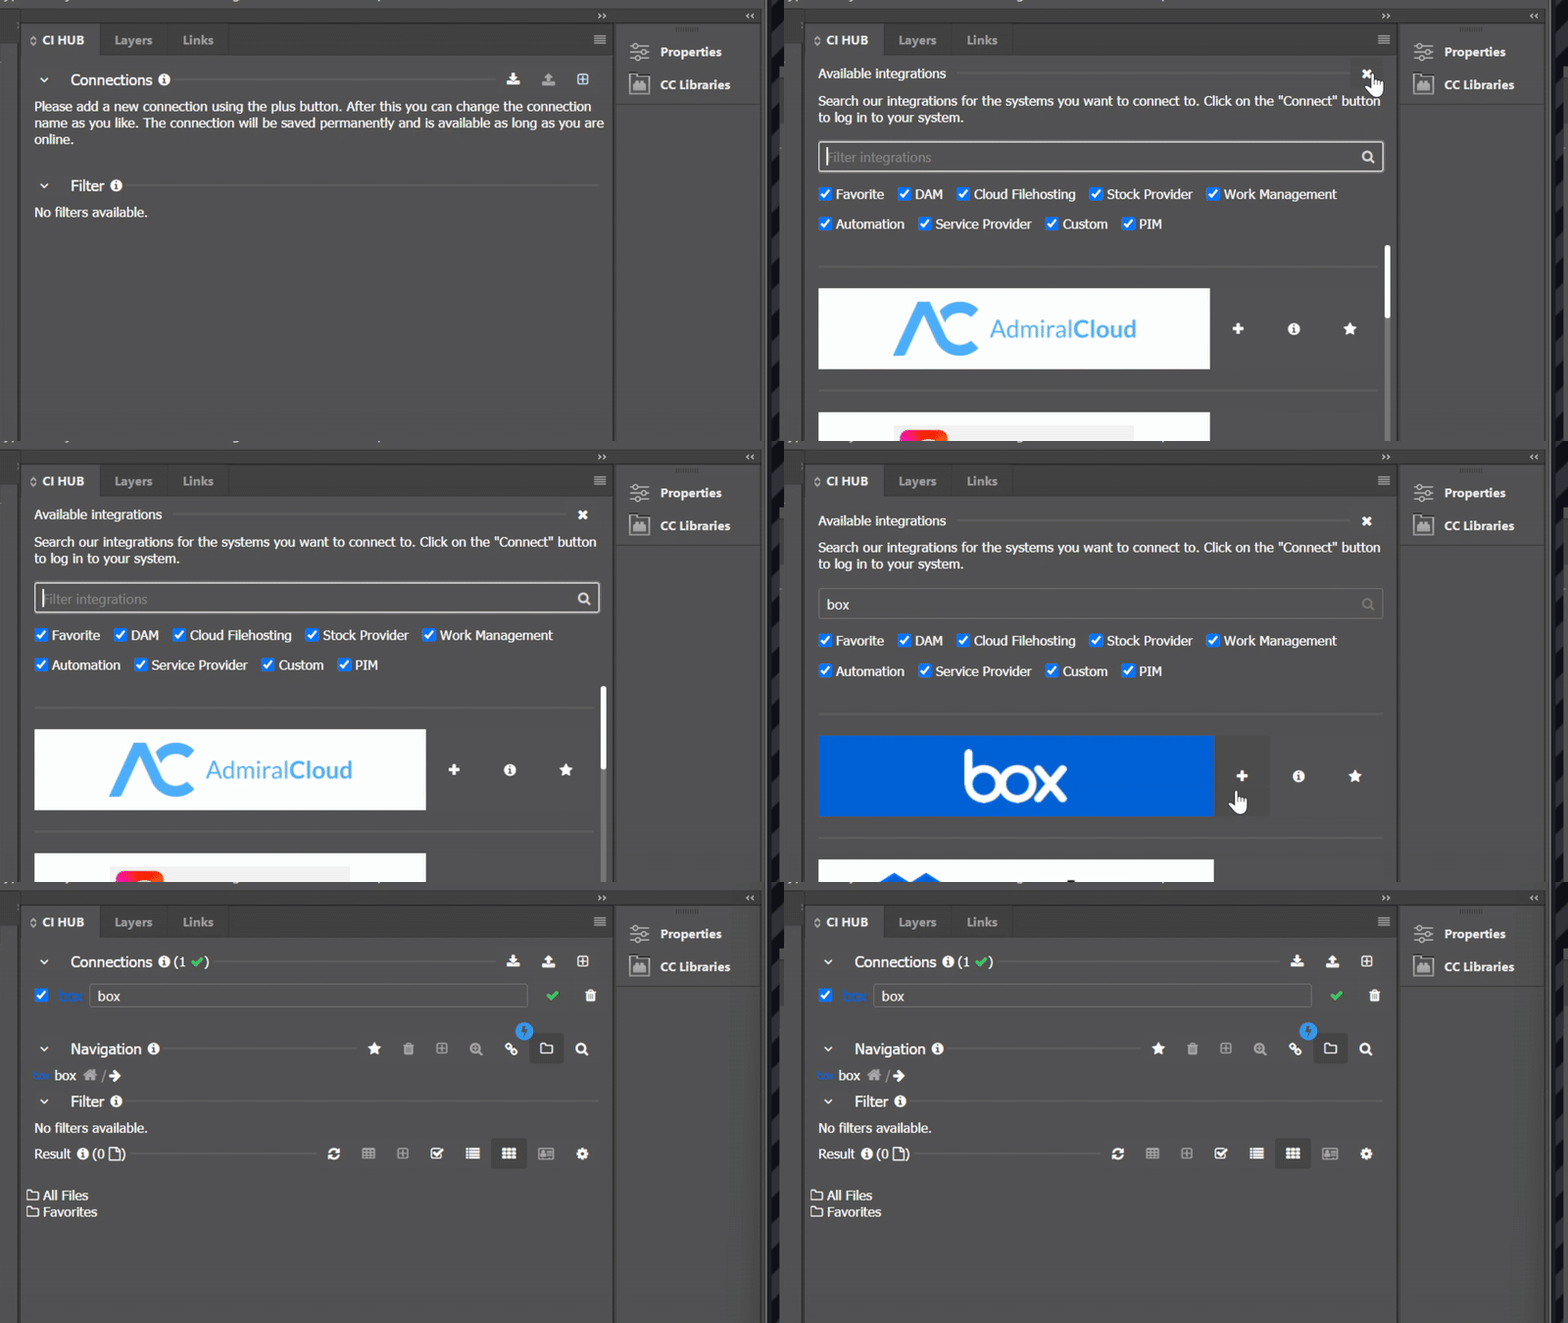
1. Open the Connections Overview
Click the "+" icon in the CI HUB Connector Professiona to see everything available to connect.
- If you haven't added anything yet, the "+" icon will blink blue to let you know you can get started.
- If there are a lot of options to choose from, you can:
- Type in a name to search for a specific one.
- Use filters like "Favorites" or "DAM, PIM, MAM or cloud storage system" to narrow things down.
- Check the "Favorites" filter to quickly find the ones you've starred before.
You can also learn more about a system before deciding to link it.
2. Select and authorize a DAM, PIM, MAM or cloud storage system
Here's how to add one:
- Click the "+" icon next to the one you want.
- You'll be taken to its own sign-in page.
- Enter your username and password, then allow CI HUB Connector Professional to access your account.
This sign-in step works just like logging in normally, it's safe and secure.
Once you've signed in, it will automatically show up in your CI HUB Connector Professional. You can repeat these steps anytime to add more.
3. Manage Your Connected DAM, PIM, MAM or cloud storage system
Once a DAM, PIM or cloud storage system is set up, here's what you can do:
- It will appear in the "Connections" list in the CI HUB Connector Professional.
- A green checkmark next to the name means it working properly.
- You can rename it, handy if you use more than one account for the same system.
- Don't need it anymore? Click the trash bin icon to remove it.
- Want faster access next time? Click the star icon to mark it as a favorite.
- If your list is getting long, click the white arrow to collapse the section and tidy up your workspace.
With these simple steps, you can easily set up, organize, and manage everything right from the CI HUB Connector Professional.
Save and load connections
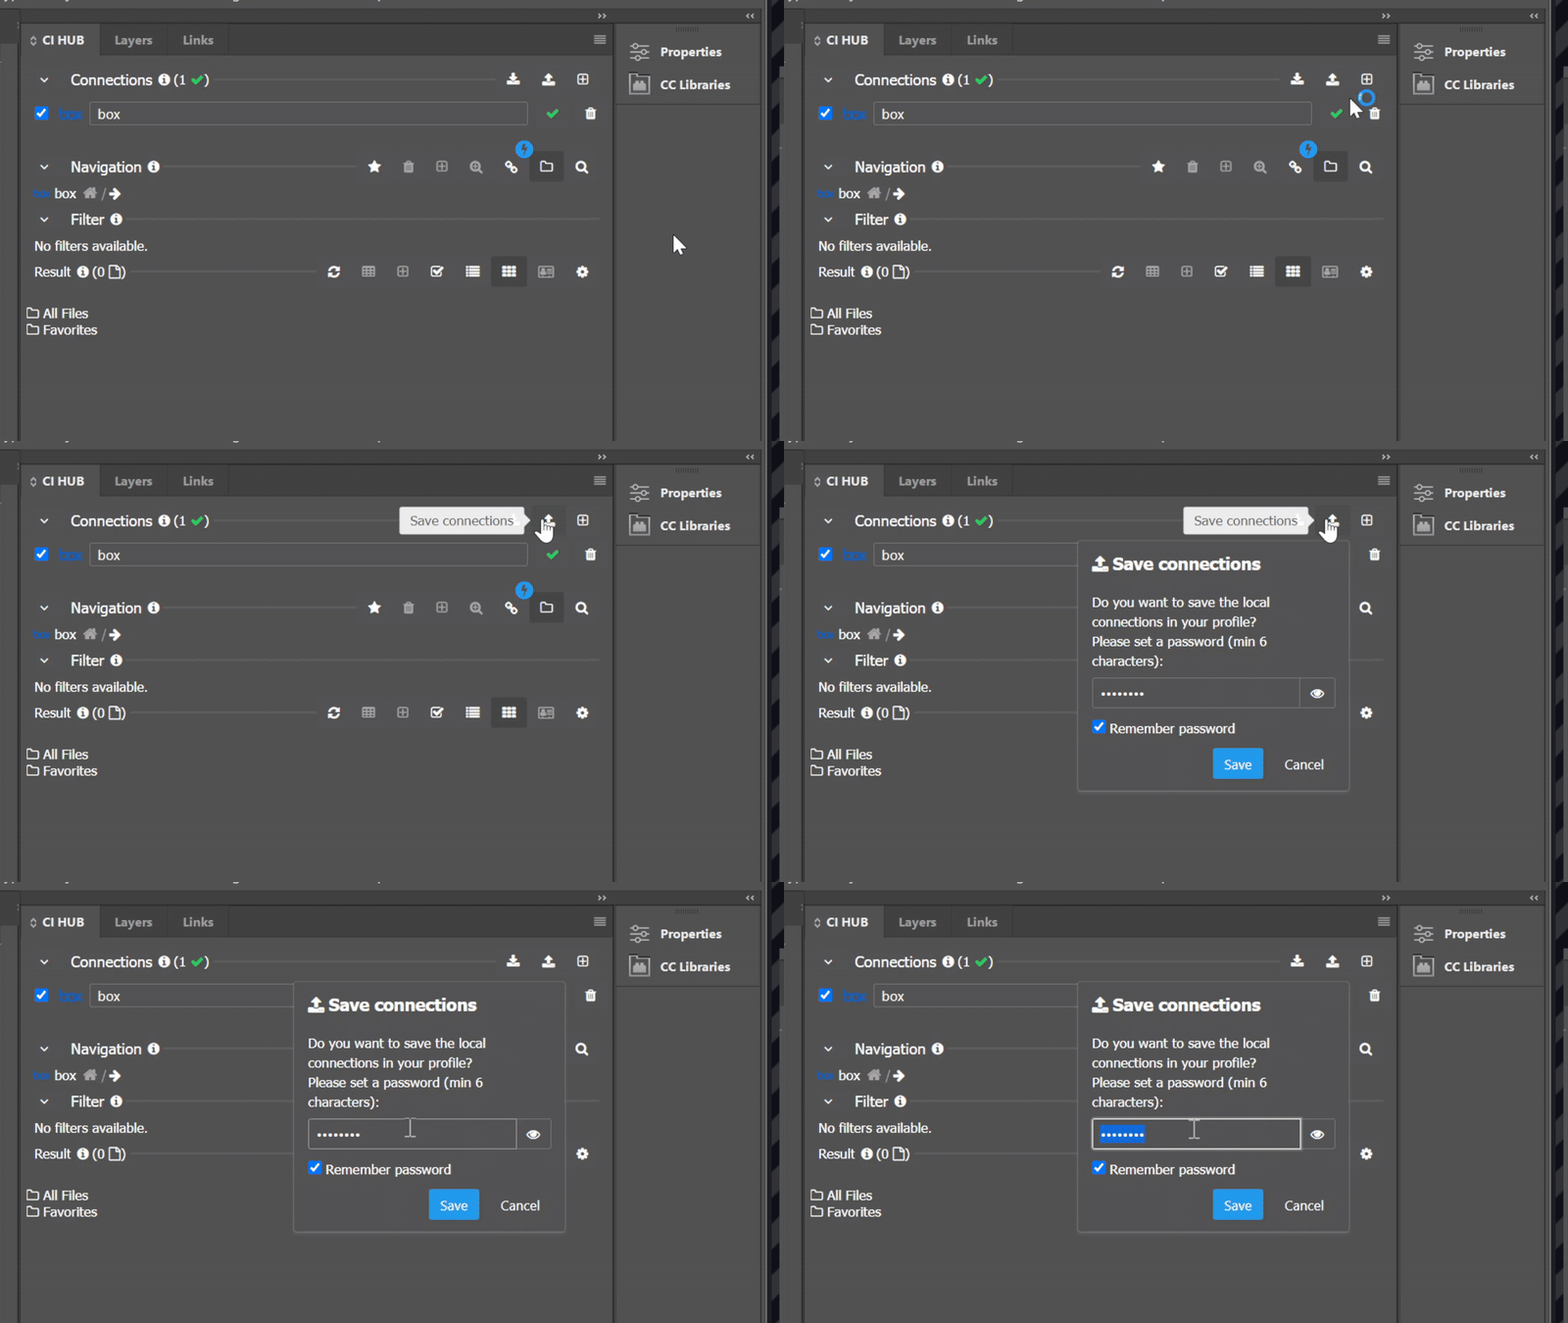
Once everything is linked the way you want, you can save your setup so you don't have to redo it later. Just click the "Save connections" icon in the menu. A window will pop up asking you to create a password (at least 6 characters). Type it in and click "Save."
Want to bring everything back later? Click "Load profile," enter the same password, and your setup will be restored.
Why is this useful?
Let's say you linked all your systems while working in Adobe InDesign, and now you need to switch to Microsoft PowerPoint. No problem, if you saved your setup, you can bring it all back with just one click, whether you're in PowerPoint or any other Microsoft Office 365 program.
Want to work with assets? Find out how to do it here
